Tag Archives: android

Running the Distributed Mandelbrot app

This app (download from Google play) demonstrates sharing jobs on mobile devices using Wi-Fi Direct. This is a prototype developed as proof-of-concept for the Honeybee model for my PhD dissertation. In this app, we generate the Mandelbrot set, with the aid of multiple mobile devices.

Delegator & workers:
The device that offloads work to other devices is referred to as the delegator, and the devices that take on work are referred to as the workers.

Step 01:
Since Wi-Fi Direct is still relatively new, some implementations are somewhat unpredictable. Therefore, I would recommend that the devices be ‘primed’ to use Wi-Fi Direct (especially the p2p group formation) before you run the app. Here’s what to do:

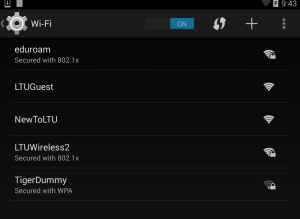
  1. Disconnect from any Wi-Fi network that the device is connected to. A live Wi-Fi connection can sometimes interfere with Wi-Fi Direct transmission. Keep Wi-Fi ‘on’, but ‘forget’ any networks that the device automatically connects to.wifiDisc
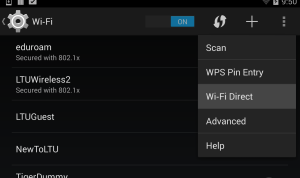
  2. Switch on Wi-Fi Direct.                                       wifidon
  3. In this example, we will use 3 devices. The device ‘Android_1’ will be the delegator, and the other 2 will be workers. We will now manually pair the devices and create a Wi-Fi p2p group, where the delegator is the p2p Group Owner (GO). The delegator needs to be the GO as only the GO can ‘see’ and connect to other devices. In the app, this is done programmatically. However, for some devices, things run smoother if the process is manually done first.
  4. Click ‘Search for devices’ on all 3.                       wifidSearchall
  5. Use Android_1 to connect to the other 2 devices.                                  connect3
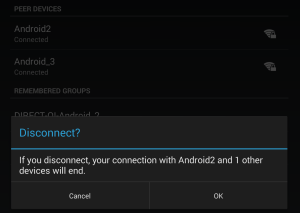
  6. Done! Now disconnect the 2 devices before running the app. discon1
 

Step 02:
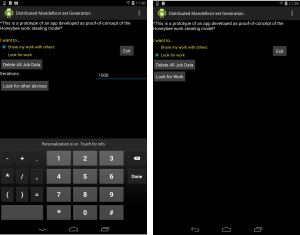
Now the app is ready to run. Run it on all three devices. Select option ‘Look for work’ on the workers (Android 2 & Android 3 in this example). Select ‘Share my work with others’ on the delegator (Android_1), and type the number of ‘iterations’ for the Mandelbrot algorithm. The higher the number of iterations are, the more resource intense the task becomes.
honey2


Step 03:
Click ‘Look for work’ on the worker devices.


Step 04:
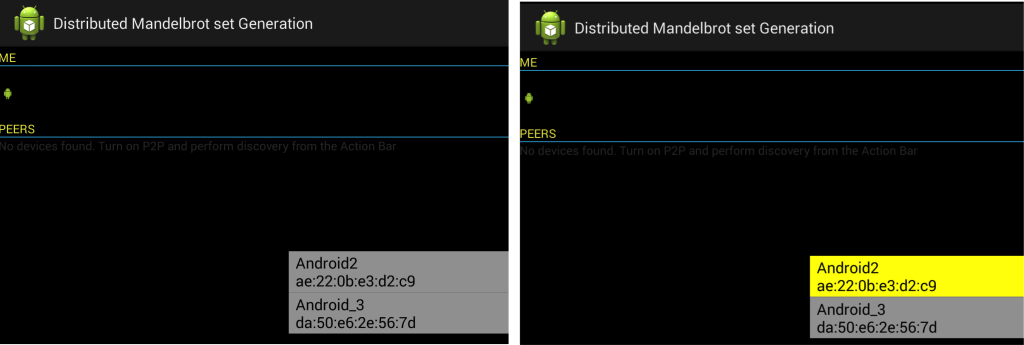
Click ‘Look for other devices’ on the delegator device. This will start the resource discovery on the delegator and soon, the worker devices will be displayed as a list. Click on each entry on the list to connect to each worker.

deleConnect2


Step 05:

The delegator would have already started executing jobs in Step 04, in parallel to its resource discovery procedure. Workers start executing jobs as soon as they connect. Although this is not visible on the app, you can see this taking place in the logcat output in the ADT if you connect the devices to a computer through USB.

Some useful log cat tags 
There are several debug tags in the program, that can be used to monitor the program execution. Some of these are as follows:

Jobs done: use on the delegator device. Shows the number of jobs done so far.
Queenbee: use on the delegator device. Shows the end result after the task completes. This outputs the total program time, battery level and no. of jobs done by each device.
RANDOM: use on the delegator device. Shows the heartbeats of the worker devices connected. If a timestamp==null becomes false, this signifies a worker has disconnected. The delegator will add the said worker’s jobs back to the job pool in this case.

Screen Shot 2014-08-19 at 2.36.21 PM

A screenshot of the Logcat output using the ADT plug-in in Eclipse.

Some experiments to try out:

  • Disconnect one or more workers while they are working.
  • Try out the continuous resource discovery by introducing workers at random intervals.
  • Increase\decrease the iteration count.
  • Use heterogenous devices (in terms of computation capability). Which device combinations give the most speedup?

Step 06:

the delegator will display the generated Mandelbrot image upon task completion. Some program stats will also be shown. Exit the program and start again if you want to do more experiments.
endDele

Android Adventures – Keeping alive a Bluetooth connection

Continuing my adventures into the Android domain, I wanted to have a Bluetooth connection between two nodes, going indefinitely, until one node sends a termination signal. Between the time of initializing the connection, and termination, the two nodes may exchange messages at random intervals.Now, the Bluetooth chat example provided in
http://developer.android.com/resources/samples/BluetoothChat/index.html is very helpful. I did use some of the code, but my client connection was defined in the Activity class itself, as a inner class extending Thread:

public class MyActivity extends Activity {
 
 //some code here that does the work in the activity
 
 
   private class MyThread extends Thread {
        private final BluetoothSocket socket;
private final BluetoothDevice device;
private WorkerInfo worker;
        public MyThread(WorkerInfo pInfo) {
BluetoothSocket tmp = null;
device = pInfo.getDevice();
worker = pInfo;
try {

UUID uuid = UUID.fromString(CommonConstants.WORKER_UUID);
tmp = device.createRfcommSocketToServiceRecord(uuid);

} catch (IOException e) {
}
socket = tmp;
}

public void run() {
try {
// Connect the device through the socket. This will block
// until it succeeds or throws an exception
socket.connect();
worker.setSocket(socket);
worker.isConnected = true;
if (D)
Log.d(TAG, “connected”);

String devName = socket.getRemoteDevice().getName();
String devAddr = socket.getRemoteDevice().getAddress();
Log.d(TAG, “connected to ” + devName + “:” + devAddr
+ “at DelegatorThread ” + this.getId());
Thread t = new Thread(new Reader(socket.getInputStream()));
t.start();
} catch (IOException connectException) {
return;
}
}

  }

}

I would call the MyThread to start() at the click of a Button, and then open an OutputStream on another Button click and write to the other node. This went fine. Then after several minutes, I wanted this to read from the other device. This is where it went wrong.
For some reason, after writing, my connection just dies. When the other device tries to write, it gets a connection reset by peer exception. However, if instead of waiting for several minutes, the other device wrote back immediately, the connection is kept alive.

there were two things I could do :

  1. Keep the connection alive by exchanging random bytes of data. I tried this out by implementing a KeepAliveClient thread and a KeepAliveServer thread. These would write and read small messages indefinitely till the actual message/s is/are ready to be transmitted. This could be done so that the actual messages are preceded by a special pattern so that the reader knows it has to switch from KeepAlive mode to actual Reading mode. After reading the actual message, it again switches back to KeepAlive mode.
  2. Share the Bluetooth object instance across Activities using the singleton model as suggested here. I implemented this version as well:

Put the MyThread into a seperate public class, and instantiate and start this thread from a singleton   class.  I call the method in singleton class from my Activity. This worked as well.

I’m not entirely sure the reason a singleton object method works though. Will continue working in the 2nd method because obviously it is more efficient (not having to keep transmitting), and hopefully things will clear out in future experiments 🙂

Bluetooth support on Android Emulator

I have been playing around with Android lately, and one thing that annoyed me is the emulator does not support Bluetooth (as opposed to J2ME emulator, which does).
So if you do not have an actual Android device (like me), and you want to do Bluetooth/WiFi programming, you run in to a problem.Fortunately, there is a way out – Install the Android image on a VM and use your own Bluetooth device. This is what I did:

  1. Download Androidx86 from http://www.android-x86.org/. This is an .iso file, so you’d need something like VMWare or VirtualBox to run it. Me, I use VirtualBox.
  2. When creating the virtual machine, you need to set the type of guest OS as Linux instead of Other.
  3. After creating the virtual machine, set the network adapter to ‘Bridged’.
  4. Start the VM and select ‘Live CD VESA’ at boot.
  5. Now you need to find out the ip of this VM. Go to terminal in VM (use Alt+F1 & Alt+F7 to toggle) and use the netcfg command to find this.
  6. Now you need open a command prompt and go to your android install folder (on host). This is usually C:Program FilesAndroidandroid-sdkplatform-tools>.
  7. Type adb connect IP_ADDRESS
  8. There done! Now you need to add Bluetooth. Plug in your USB Bluetooth dongle.
  9. In VirtualBox screen, go to Devices>USB devices. Select your dongle.
  10. Done! now your Android VM has Bluetooth. Try powering on Bluetooth and discovering/paring with other devices.
  11. Now all that remains is to go to Eclipse, and run your program. The Android AVD manager should show the VM as a device on the list.

I found these links helpful. Perhaps you would too:
http://androiddevnotes.com/2011/03/08/1299521520000.html
http://developer.android.com/guide/topics/wireless/bluetooth.html#EnablingDiscoverability

🙂
Happy coding!